3D Halloween Cute Ghost Paper Cut: A Creative and Practical Project for Seasonal Decor
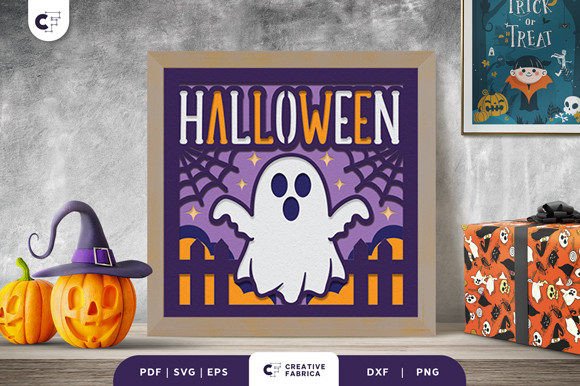
The 3D Halloween Cute Ghost Paper Cut is a delightful, easy-to-create decorative piece that adds charm to any Halloween-themed space. Designed with a whimsical twist, this project combines the traditional art of paper cutting with modern 3D design techniques to produce an eye-catching light box. It’s ideal for those who want to celebrate Halloween in a fun yet family-friendly way, especially when creating something for younger children or adding a personal touch to home decor.
Understanding the 3D Halloween Cute Ghost Paper Cut
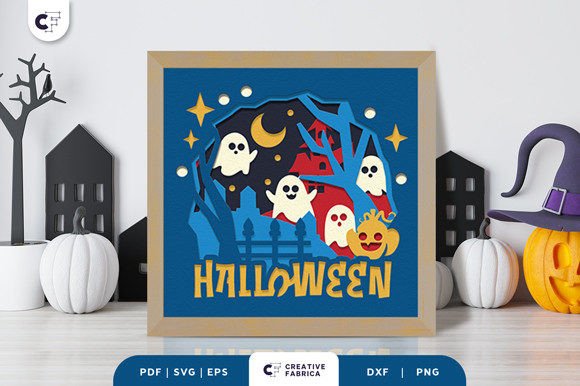
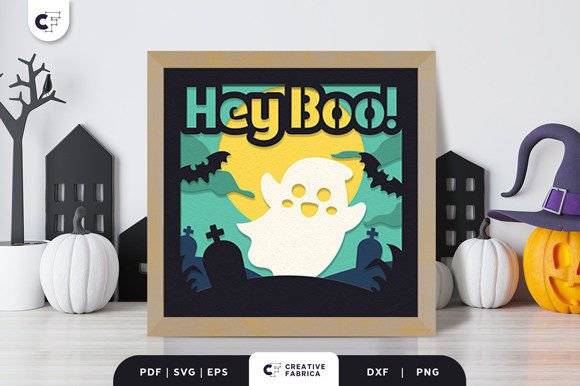
This project centers around a layered paper cut design featuring a cute ghost figure with bright eyes and the playful phrase “Hey Boo.” The design is crafted using multiple layers of cardstock, which are precisely cut and assembled to create a three-dimensional effect. When placed inside a shadow box or light box, the result is a charming, spooky yet sweet visual that captures the essence of Halloween without being too frightening.
The graveyard background enhances the theme while maintaining a soft aesthetic, making it perfect for kids’ rooms, classrooms, or even as a gift. This design is not just about the final product; it's also about the creative process involved in bringing it to life.
Tools and Materials Required
To successfully complete the 3D Halloween Cute Ghost Paper Cut, you’ll need specific tools and materials. These include:
- A cutting machine such as Cricut or Silhouette. These machines allow for precise cuts and are essential for achieving the clean lines and intricate details of the design.
- 3D adhesive, like foam double-sided tape. This is used to give the layers depth and dimension, transforming flat paper into a visually appealing 3D structure.
- Encore Cardstock (80 lb cover, 216 gsm). This high-quality cardstock ensures durability and crisp cuts, crucial for a professional-looking outcome.
- Optional items such as a decorative frame and LED lights can enhance the display and make it more festive.
These materials are easily accessible and compatible with most digital crafting workflows. If you’re already using a cutting machine for other projects, this one integrates seamlessly into your existing toolset.
Design Formats and Dimensions
The 3D Halloween Cute Ghost Paper Cut is provided in multiple file formats to suit various needs and software preferences. Available options include:
- SVG – Scalable Vector Graphics format, ideal for use with most cutting machines and design platforms.
- PDF – Perfect for printing at home or for reference purposes.
- EPS – Useful for advanced editing in programs like Adobe Illustrator.
- PNG – Great for digital displays or if you plan to print on different media.
- DXF – Suitable for laser cutting or specialized design software.
The design features six distinct layers and measures 20.32×20.32 cm, making it compact enough for small spaces but large enough to showcase detail. Keep in mind that colors may appear slightly different in real life due to lighting conditions and the actual paper color used.
Preparation and Planning
Before starting your project, ensure you have all necessary supplies ready. Begin by selecting the appropriate file format based on your cutting machine or software. Import the design into your chosen platform and adjust the size if needed, though the standard dimensions are well-suited for most applications.
Next, prepare your cardstock. Choose from available colors to match your Halloween theme—white and black are classic choices, but pastels or seasonal hues can add a unique flair. Since the design uses six layers, organize them clearly either digitally or physically to avoid confusion during assembly.
Integration into Your Creative Workflow
If you're an educator, consider using this project as part of a classroom activity leading up to Halloween. It encourages creativity, fine motor skills, and teamwork, especially if students work in pairs or groups. For bloggers or content creators, this makes a great DIY tutorial or product review, showcasing both artistic value and practicality.
Entrepreneurs and small business owners might incorporate this design into their seasonal offerings, such as selling finished pieces or kits. Marketers could use it as a branded prop for social media campaigns or in-store displays. The versatility of the 3D Halloween Cute Ghost Paper Cut allows it to fit into many different contexts and workflows, from personal craft projects to commercial ventures.
Assembly and Execution Tips
Once your design is cut, begin assembling the layers carefully. Start from the backmost layer and move forward, applying foam adhesive between each to build up the 3D shape. Ensure alignment is consistent across all layers to maintain the visual integrity of the ghost and its surroundings.
If you're using a shadow box or light box, secure the base first before attaching the layers. Consider placing a small LED light underneath or within the box to highlight the design. The light will cast shadows through the paper layers, enhancing the 3D effect and giving your creation a magical glow.
For best results, take time to test assemble a few pieces before finalizing the full project. This helps identify potential issues with spacing or adhesion early in the process, saving time and reducing errors later on.
Customization and Use Cases
One of the strengths of the 3D Halloween Cute Ghost Paper Cut is its adaptability. You can modify the design to include names, dates, or personalized messages, making it suitable for party decorations, photo props, or themed gifts. Educators might add educational elements like counting ghosts or labeling parts of the graveyard for a learning-based activity.
Freelancers and publishers can leverage this design in holiday greeting cards or printable templates for online shops. Entrepreneurs in the event planning industry might use it as a backdrop for photoshoots or a centerpiece for kid-friendly Halloween events.
Maintaining Quality and Long-Term Use
To preserve the quality of your completed project, handle it gently and store it in a dry place when not in use. If you opt for an LED light, ensure it's powered off when storing to prevent overheating or damage to the paper. Regular maintenance checks can help keep the design looking fresh year after year.
Consider scanning your finished piece or taking high-resolution photos for future reference. This can be especially useful if you plan to recreate the design or share it as part of a portfolio or blog post. Maintaining consistency in material choice and construction method will help ensure uniform results over time.
Organizational and Efficiency Strategies
When working on multiple units or preparing for a larger project, organization is key. Label each file clearly before cutting, and sort the layers by order of assembly. Using a spreadsheet or checklist can streamline the process and reduce the risk of missing steps.
If you're collaborating with others or managing a team, assign roles based on strengths—for example, one person handling design adjustments, another focused on cutting, and a third responsible for assembly. This division of labor improves efficiency and keeps the workflow smooth.
Enhancing the Experience with Additional Resources
While the 3D Halloween Cute Ghost Paper Cut is self-contained, there are several ways to expand the experience. Explore additional designs from the same collection to create a cohesive set of decorations. You can also combine it with other Halloween-themed assets, such as printable invitations or coordinating signage.
For those new to paper cutting or 3D crafting, online tutorials and forums can offer helpful insights. Many creators share tips on adjusting designs for different sizes or materials, which can be invaluable when experimenting with variations.
Final Thoughts on Implementation
Bringing the 3D Halloween Cute Ghost Paper Cut into your workflow is straightforward and rewarding. Whether you're crafting for personal enjoyment, planning a school activity, or building a seasonal product line, this design offers a blend of simplicity and sophistication. Its compatibility with digital tools and adaptability to various settings make it a versatile addition to your creative arsenal.
By focusing on preparation, clear execution, and thoughtful integration, you can maximize the impact of this project. It’s not just about the final decoration—it’s about the joy of the process, the satisfaction of seeing a finished piece, and the ability to connect with your audience through something uniquely handmade and heartfelt.