Ghost 3D Shadow Box Paper Cut SVG: A Spooky and Stylish Craft Project
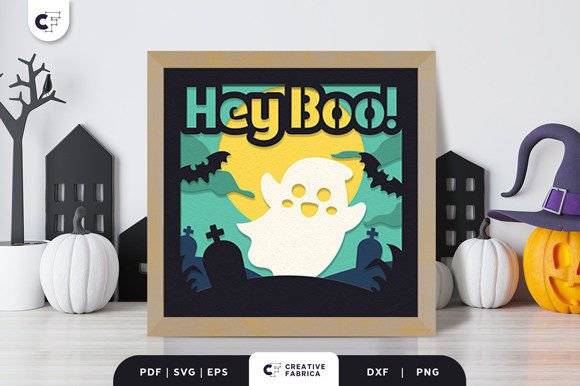
Halloween is the perfect time to let your creativity shine, and one of the most captivating ways to do so is with the Ghost 3D Shadow Box Paper Cut SVG. This design combines the charm of traditional paper cutting with modern digital tools to create a whimsical 3D shadow box that adds depth and character to any Halloween decor. Whether you're crafting for a party, home display, or gifting, this SVG brings an enchanting twist to the classic ghost motif.
What Is Ghost 3D Shadow Box Paper Cut SVG?
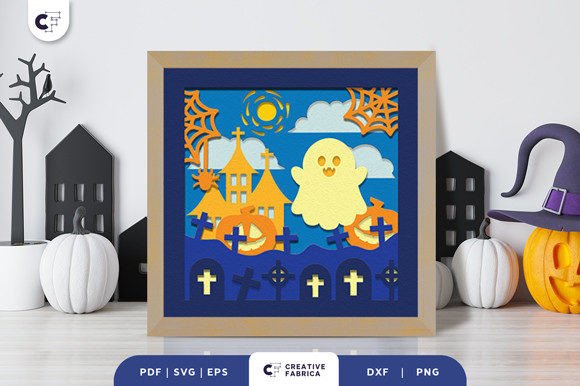
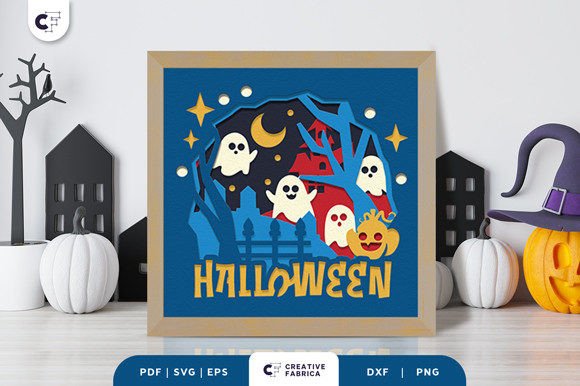
The Ghost 3D Shadow Box Paper Cut SVG is a downloadable digital file designed for use with cutting machines like Cricut or Silhouette. It features multiple layers that, when assembled, form a floating, three-dimensional effect—ideal for creating eye-catching Halloween decorations. The design includes playful ghosts in various poses, expressions, and sizes, giving it a lively and spooky feel.
This SVG is formatted for precision and ease of use, offering compatibility with common file types such as SVG, PDF, EPS, PNG, and DXF. With seven distinct layers and a size of 20.32×20.32 cm, it’s perfect for framing or displaying on a shelf. The final product is crafted from cardstock, specifically Encore Cardstock 80 lb cover (216 gsm), which provides durability and a clean finish for intricate details.
Why People Love This Design
Crafters and decorators are drawn to this SVG because it merges simplicity with visual impact. Here's why:
- Easy to assemble: Despite its 3D look, the layered design is straightforward to put together.
- High-quality materials: The recommended cardstock ensures crisp cuts and professional results.
- Customization options: Add LED lights or decorative frames to enhance the spooky ambiance.
- Versatile use: Ideal for wall art, centerpieces, gift tags, or even classroom displays.
Whether you're a seasoned crafter or just starting out, the Ghost 3D Shadow Box Paper Cut SVG offers a fun way to elevate your Halloween projects without requiring advanced skills.
Common Mistakes When Using Ghost 3D Shadow Box SVG
While this design is user-friendly, there are some common pitfalls that can affect the outcome. Let’s explore them and how to avoid them:
Mistake 1: Ignoring Layer Order During Assembly
One of the biggest mistakes beginners make is not following the correct layer order when assembling their shadow box. Since the 3D effect relies on each ghost being positioned correctly relative to the others, misalignment can ruin the illusion of depth.
Better approach: Always start by printing or cutting the layers in the order specified in the design file. Begin with the largest ghost at the back and work forward to the smallest. Use a ruler and light pencil marks to align them accurately before adhering with foam adhesive.Mistake 2: Skipping the Recommended Cardstock
Some users attempt to use regular printer paper or cheaper alternatives to cut the design. However, the intricacy of the ghosts demands sturdy material that holds up during assembly and handling.
Better approach: Stick to the suggested Encore Cardstock 80 lb cover (216 gsm) for best results. If unavailable, choose a high-quality 12×12 cardstock with similar weight and texture to ensure clean cuts and dimensional stability.Mistake 3: Underestimating Lighting Conditions
Many people don’t consider how lighting affects the appearance of their finished project. While the preview images showcase vibrant colors, the actual result may vary slightly depending on the paper color and ambient lighting.
Better approach: Test your design under different lighting conditions if possible. For a more dynamic display, pair it with LED string lights behind the shadow box to highlight the cut-out details and give it a glowing effect.Mistake 4: Not Checking Machine Settings Before Cutting
A cutting machine requires precise settings for different materials. Failing to adjust the pressure or blade depth can lead to incomplete cuts or damaged paper.
Better approach: Consult your machine’s manual and set the correct pressure for thick cardstock. If you’re unsure, run a test cut on scrap paper first. This small step can save you time and frustration later.Practical Tips for Success
To help you get the most out of your Ghost 3D Shadow Box Paper Cut SVG, here are a few key considerations:
Tip 1: Choose the Right Adhesive
Not all adhesives are suitable for 3D shadow boxes. Regular glue can flatten the design or cause warping over time.
- Use foam double-sided tape for spacing between layers.
- Opt for acid-free glue sticks or liquid glue for securing non-moving parts.
- Apply adhesive only where necessary to maintain flexibility and prevent curling.
Tip 2: Plan Your Display Space
Before assembling your shadow box, think about where it will be displayed. A corner of a shelf, inside a picture frame, or on a mantel can all change how the piece looks and functions.
Example: If you're making multiple shadow boxes for a themed room, arrange them in varying heights to add visual interest. For a window display, consider using translucent vellum instead of white cardstock for a haunting glow effect.Tip 3: Customize for Personal Touches
Though the design is already charming, adding personal touches can make it uniquely yours. Think beyond the basics:
- Paint the edges of the ghosts with black ink or glitter for a dramatic flair.
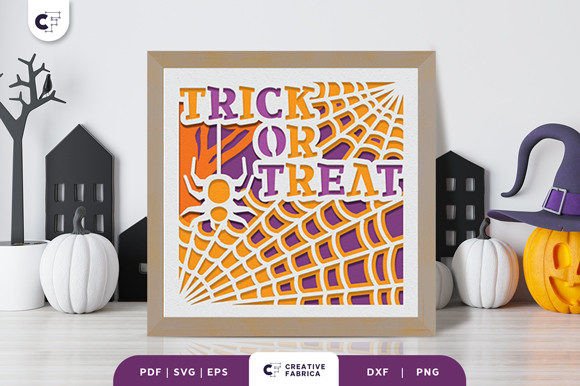
- Include phrases like “Trick or Treat” or “Boo!” using additional SVG text elements.
- Use colored cardstock for a festive look—try purples, oranges, or teal for contrast.
What to Check Before Starting
Before diving into your project, take a moment to review these important factors to avoid unnecessary rework or wasted materials:
- Machine Compatibility: Ensure your cutting machine supports SVG files and that your software is updated.
- Layer Clarity: Open the design file and verify that all seven layers are visible and properly aligned.
- Paper Availability: Confirm you have the right type and thickness of cardstock available.
- Lighting Setup: Decide ahead of time whether you want to include LED lights or other enhancements.
By checking these details upfront, you’ll streamline the process and ensure your final creation meets your expectations.
Comparing Ghost 3D Shadow Box SVG to Other Halloween Crafts
Compared to traditional paper crafts, the Ghost 3D Shadow Box SVG offers several advantages:
- Time Efficiency: Pre-designed SVGs reduce the need for hand-drawing or sketching.
- Consistency: Digital designs ensure uniformity across multiple projects.
- Storage and Reuse: Unlike hand-cut designs, SVGs can be saved and reused for future events.
If you’ve tried making Halloween ghosts manually before, you might find the 3D shadow box SVG much easier to replicate and customize. Plus, it’s less likely to result in uneven shapes or mismatched proportions.
How to Evaluate the Quality of Your Ghost 3D Shadow Box
After completing your shadow box, take a moment to assess the quality. Here are a few things to check:
- Sharpness of Cuts: Any jagged lines or missed corners could indicate incorrect machine settings.
- Layer Alignment: Misaligned pieces can detract from the 3D illusion. Adjust gently if needed.
- Adhesive Performance: If the layers are sagging or moving, the adhesive might not be strong enough.
- Overall Presentation: Does it fit the space? Is it visually balanced and cohesive?
Evaluating your work after completion helps you identify what went well and what could be improved next time. It also builds confidence in your crafting abilities and ensures your creations are both functional and beautiful.
Final Thoughts
The Ghost 3D Shadow Box Paper Cut SVG is more than just a craft—it’s a gateway to creative expression during the spookiest time of the year. By avoiding common mistakes and following practical advice, you can transform a simple digital file into a stunning Halloween decoration that impresses everyone who sees it.
Remember, the success of your project depends on thoughtful preparation and attention to detail. Take your time, follow the steps carefully, and don’t hesitate to experiment with colors, lighting, and layout to match your style. Happy crafting, and may your haunted night be filled with delightful surprises!